MiniOS in an HP Stream that ran like molasses with Windows 11
After many years, I finally got found a distro that runs perfectly from a USB! So good that it could become your daily driver!
It is also the best way to try Linux, with no installation whatsoever, without touching your Windows OS.
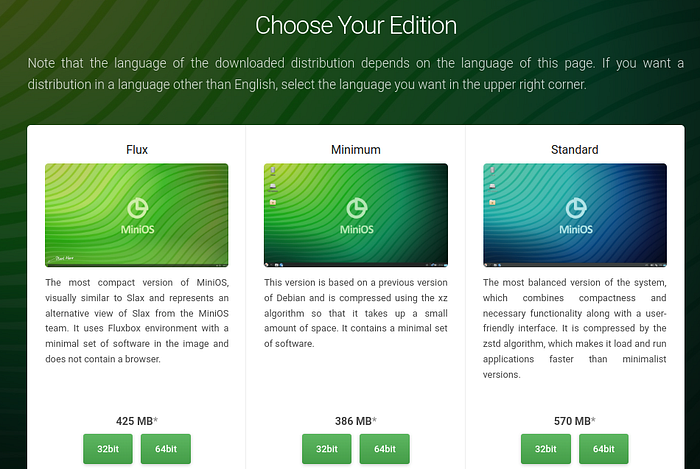
I’m assuming you are using Windows already. Go to minios.dev and click Download:

Assuming you have a modern computer (4GB RAM or more, not older than a decade), I’d recommend downloading the “Standard” edition, 64 bit.
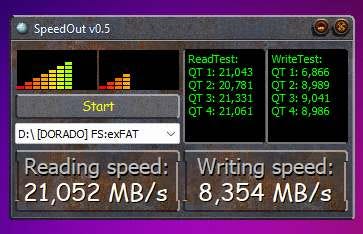
If you have a few USB thumb drives lying around, it could be useful to test their speeds first. Any USB thumb drive with 8GB or greater will do.
Download a little utility to test their speeds: https://pendriveapps.com/speedout-usb-speed-test/ (click “SpeedOut Download”) unzip it, run it and click “Start.” Test your different thumb drives and choose the fastest.
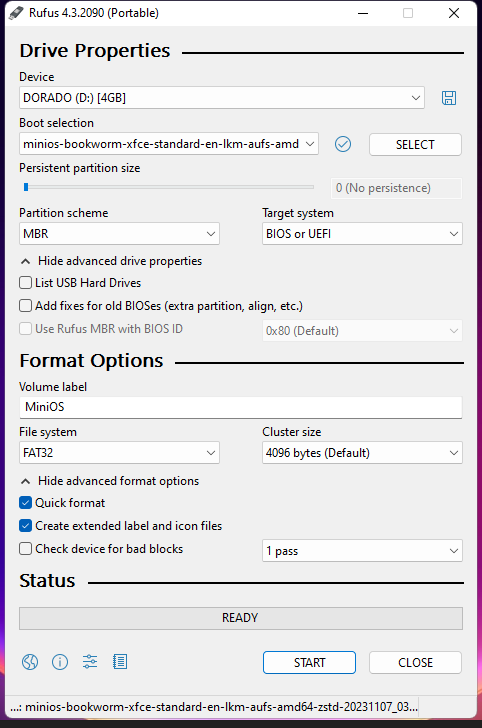
Now that you have downloaded MiniOS Linux and have chosen a USB drive to install it, go to rufus.ie and download Rufus. It’s a little program that will allow us to save MiniOs in the USB drive so it becomes “bootable,” that is, you can actually use it to start your computer; it is not enough to just “copy” the Linux in the USB; it is necessary to perform some “magic under the hood” so you can use it to boot your computer.
Double-click the Rufus .exe file to run it; it doesn’t need installation.
If the USB is already plugged in, you should just click the “Select” button to choose the MiniOS you downloaded earlier, and then click “Start.” After a few minutes, it will be ready. You don’t need to set any “Persistent partition size.”
Beware: everything in the USB drive will be erased! Make sure you don’t have any important info in it.
Leave it plugged, since we will test it after a little configuration!
Windows is a jealous OS! It tries to keep you inside its “walled garden.” It doesn’t like you trying none of those newfangled Linux nonsense. Mr Bill Gates has made it specially difficult to try new OS’s! So it’s necessary to “open the hood” of your computer a little. Just a little, don’t worry!
We’ll enter the BIOS. I’ve been entering BIOS’s since I was a kid, don’t fret.
Normally you enter the BIOS by pressing one certain key a few seconds after you turn on your computer. Usually for a second or two you’ll read: “press Del, or F2, or F12 to enter BIOS,” or a similar message.
Many new systems don’t offer any alternatives; they just boot into Windows, and that’s it.
So it’s easier to enter the BIOS from inside Windows!
Go to the “power” menu, and click to reboot (not shutdown) your system, but while pressing the “Shift” key:
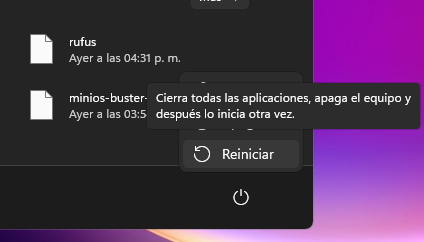
Sorry for the caption in Spanish! It’s Reboot! 😅
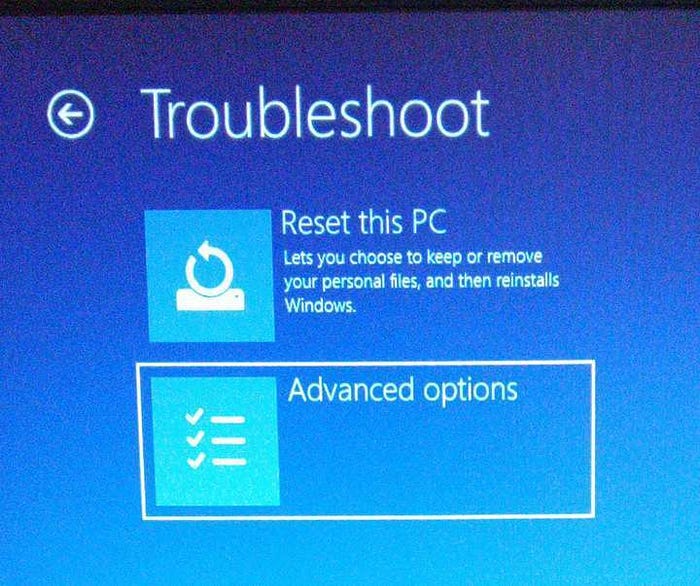
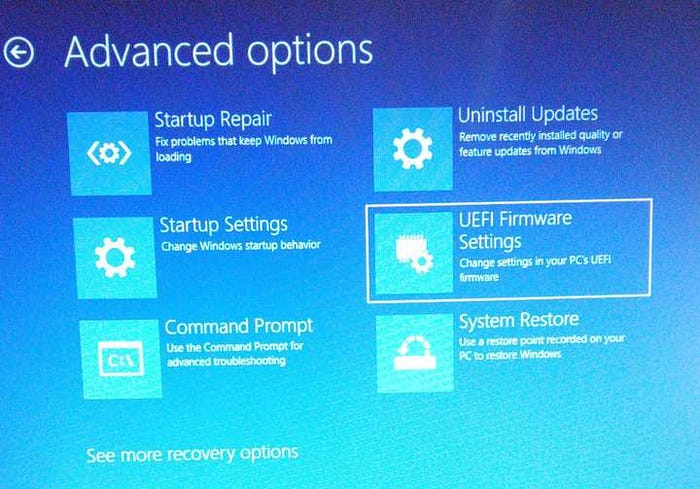
After a few seconds, you’ll be presented with these screens, choose the selected options:

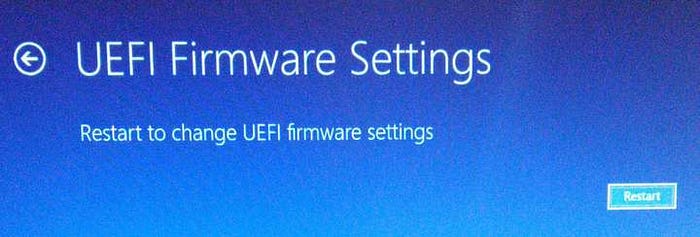
Click that last “Restart” button. It’s almost as if Microsoft doesn’t want you to enter any BIOS nor trying any other OS, right? They have you jump through so many hoops!
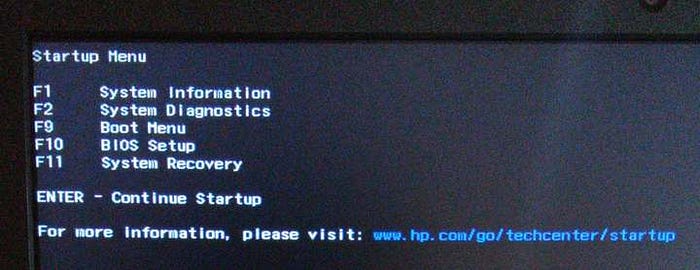
In my case, I was shown this screen; I pressed “F10” to enter BIOS Setup. Yours will be something similar:
Then oh, the so-dreaded BIOS! First time I entered it was in a friend’s computer back in 1992. (I remember it didn’t boot after meddling with the BIOS, ha-ha! His dad grounded him because of me. 😖)

No need to panic or get nervous! Follow along and everything will be OK.
Probably you’ll have to use the keyboard; some computers will allow the mouse. Go to the “System configuration” tab:
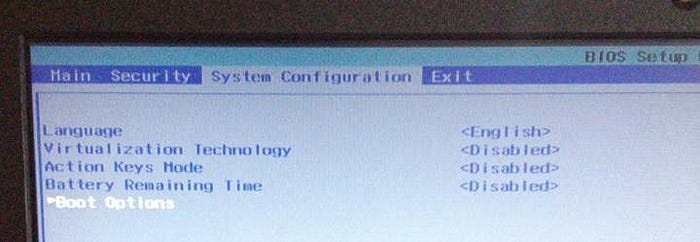
There, we’re interested in “Boot Options.” We enter there:
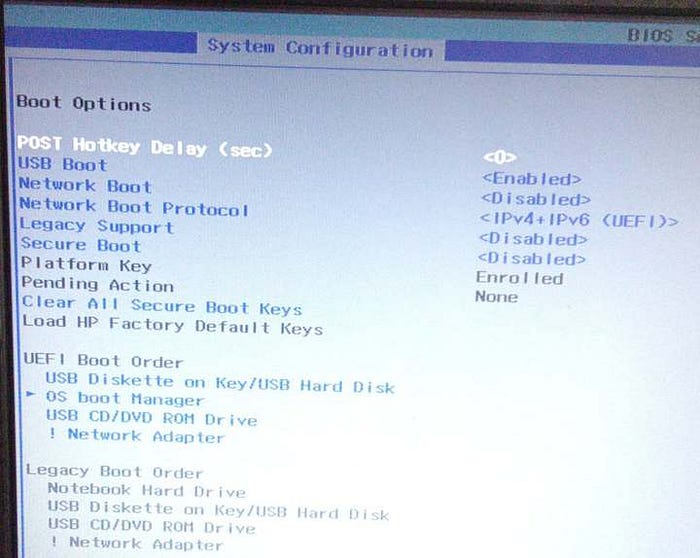
So you want these three things: 1) “USB Boot” enabled; 2) “Secure Boot” disabled; 3) “UEFI Boot Order”, the “USB Diskette” must be first, above the rest.
This last part is tricky; read the instructions. In my case, I needed to press F5/F6 and the arrow keys to “move up or down” the different choices. And the fact that “OS boot Manager” still remains pointed with an arrow (after being made the second choice) doesn’t make any easier! But that’s how it is. The BIOS will show you instructions; follow them.
Look for the button to “Save and exit,” and your computer should start booting MiniOS Linux from the USB that you left plugged! That’s all!
Be patient, since booting from a USB will be much slower than from a hard disk or SSD. After you enter Linux, first order of business will be setting your WiFi password, and then start tinkering!
Don’t worry if you ruin your Linux installation somehow. We all have “been there, done that,” it’s part of the experience! MiniOS won’t touch your Windows installation.
In case anything goes wrong and you panic, try to turn off the computer from the menu; if you can’t, keep the power button pressed for a few seconds (twelve at most) and your computer will probably turn off. Use the reset button if you have one.
Then try again! Welcome to your Linux journey! You’ll remember these days fondly.
You can create files and download them from the internet, and after a restart, they’ll be there were you left them (in the USB). Get acquainted with Linux!
Lastly, beware that you can login and install and remove software without entering any password! Yes, that includes sudo commands. So that’s a risk of course; don’t leave any sensitive information in that thumb drive!
Also bear in mind that every once in a while these drives perform hara-kiri and just die without any warning, so backup your data. Mind any open sessions you leave in the browser! Anyone with the thumb drive can potentially read your emails etc.